Decorative Floral Ornaments SVG Cut File: A Designer’s Review
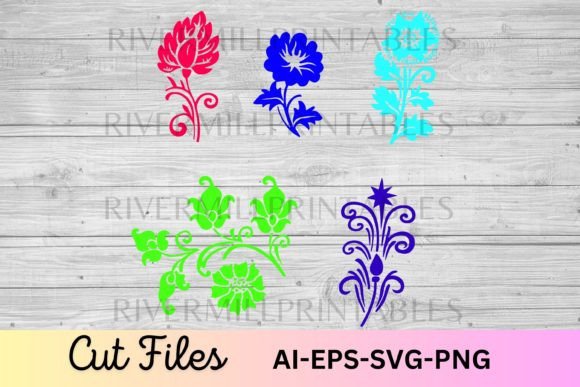
I have a client who asked for a custom embroidered linen tote bag—something elegant, a little botanical, but definitely not stuffy. The moment I saw the Decorative Floral Ornaments SVG Cut File, I knew I had my starting point. It’s not a finished embroidery file, but a clean, well-drawn graphic asset that comes with AI, EPS, SVG, and PNG formats. As an embroidery designer, I treat files like this as raw material: I evaluate the linework, the spacing, and the overall mood to decide if it’s worth digitizing for a real machine embroidery project. This one holds up under that kind of scrutiny.
What the Design Feels Like Before You Even Stitch
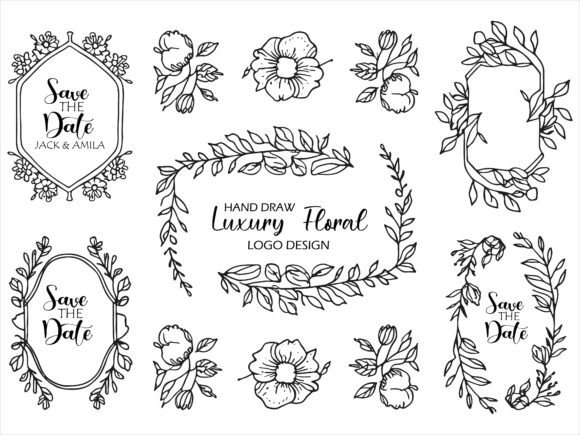
The set has a quiet, old-world charm—think vintage botanical plates softened by a modern hand. The ornaments aren’t overly dense; they breathe. Leaves curl gently, flower heads sit with a balanced weight, and the decorative flourishes between them feel intentional, not just filler. The mood is calm, slightly romantic, and very giftable. When I opened the SVG file in my digitizing software, I could already see the stitch path forming in my head: a mix of satin outlines, subtle fill layers, and just enough running stitch to keep the fabric from puckering.
For the tote bag project, I chose a corner cluster from the set—two intertwined blooms with a trailing vine. The shape fits a 5×7 hoop without any squeezing, and the negative space inside the ornament leaves room for the linen texture to peek through. That’s exactly the kind of detail that makes a handmade product feel intentional, not just decorated.
From Digital Graphic to Embroidery Stitches
This Decorative Floral Ornaments SVG Cut File isn’t an embroidery file, and that’s important to say upfront. You get AI, EPS, SVG, and PNG formats. The vector files scale beautifully, and the PNG gives you a quick preview for mockups. As an embroidery designer, I use the SVG or EPS to bring the design into my digitizing program, then manually set stitch types, densities, and underlay. The linework is crisp, so converting it to a satin stitch outline is straightforward. The inner shapes are large enough to accept a light fill stitch without warping lightweight fabrics, and the curves are smooth—no jagged anchor points that would translate into messy trims.
One thing I always check is how the design reads in black and white. I tested the ornament in a grayscale preview, and the silhouette holds its own. That matters for embroidery because thread color contrast works the same way: a good design keeps its identity even when you swap dark thread on light fabric. I tried a deep navy on natural linen, and then a soft ecru on a dark canvas. Both felt right, which tells me the design has enough structure to handle different product aesthetics.
Where This Design Shines Brightest
Right now I can picture this on a whole range of finished products. A single ornament centered on a baby onesie feels delicate and sweet. Two ornaments mirrored on the chest of a lightweight sweatshirt give a boutique-brand look. It also works beautifully on a kitchen towel, a pillow cover, or a simple apron—anywhere you want a decorative accent that doesn’t scream. The floral motif is universal enough for wedding gifts, yet casual enough for a craft fair table.
Small business owners and Etsy sellers will appreciate how versatile the set is. Because you get multiple ornaments in one download, you can build a mini collection within your shop: a tote bag line, a set of baby blankets, a matching cap and patch duo. The Decorative Floral Ornaments SVG Cut File becomes a design asset that you can adapt across products without everything looking the same. I’ve already sketched out how I’d use the same ornament on a canvas pouch and a coordinating tea towel—just shifting thread colors and stitch densities.
Heads-Up for Small Details and Dark Fabrics
No design is perfect for every scenario, and I’m always cautious about tiny details. Some of the thinner vine tendrils might need to be simplified before digitizing if you’re working on a very small hoop, like a 4×4. The fine lines can close up or become blobby if the stitch density is too high. I always test on scrap fabric first—a piece of the same cotton or linen I’ll use for the final product—and check how the stitches settle. A light stabilizer is enough for most woven fabrics, but for stretchy jersey or curved surfaces like caps, you’ll need a cutaway stabilizer and possibly a topping to keep the stitches crisp.
Dark fabrics deserve extra attention. The floral ornaments have graceful open spaces, which means the background fabric color acts as a design element. If you use a dark thread on a dark fabric, the ornament can lose its definition. I recommend testing your thread color on a dark swatch before committing to a full project. Sometimes a single shade lighter or a subtle sheen makes all the difference. Also, if you plan to use this for an embroidered patch, remember that a satin stitch border around the edge will need clean entry and exit points—the original SVG lines are smooth, so that work is already half done.
Real-Life Project: The Custom Tote Bag
Back to the tote. I digitized the corner ornament with a 2mm satin stitch for the main outlines, a light fill for the petals, and a running stitch for the leaf veins. The linen handled it beautifully. I used a fusible no-show mesh stabilizer, and the stitches sank just enough to feel integrated, not puffy. The client loved the result—it looked like a small-batch boutique piece, not a craft experiment. That’s the kind of finish that builds customer trust and repeat sales.
If you’re selling finished products, presentation matters as much as the stitching. The PNG format included in the download is handy for creating printable mockups or listing photos. I used it to show the client a digital preview before I even hooped the fabric. That saved time and gave her confidence in the final look. Small gestures like that make a craft business feel professional.
Practical Designer Notes for Real Projects
If you’re planning to use this Decorative Floral Ornaments SVG Cut File in your embroidery or craft business, here’s what I’d recommend based on experience:
- Test on scrap fabric first. Every machine and fabric combination behaves a little differently. Run a stitch-out before you commit to a finished piece.
- Check thread color contrast. Hold a thread cone next to the fabric in natural light, and take a photo in black and white to see if the design still reads clearly.
- Review stitch density. If you’re digitizing the design yourself, keep the density appropriate for the fabric. Too dense, and you’ll create stiffness; too light, and the design looks thin.
- Confirm hoop size. The ornaments are modular, but measure the dimensions after scaling to make sure they fit your available hoops. A 5×7 or 6×10 hoop gives you plenty of breathing room.
- Inspect small details. Zoom in on the SVG before digitizing. Some tiny internal curves may need manual adjustment to stitch cleanly.
- Use proper stabilizer. Match it to your fabric weight and stretch. For tote bags, a medium cutaway or no-show mesh works well. For thin or stretchy fabrics, a cutaway is safer.
- Check licensing before selling finished items or digital products. The download includes AI, EPS, SVG, and PNG formats, but you need to confirm any commercial use terms directly with the seller. Don’t assume.
How This File Affects Visual Appeal and Customer Engagement
When a customer picks up a handmade product, they notice the little things—the evenness of the stitch, the shape of the motif, the way the design relates to the product’s edges. The Decorative Floral Ornaments SVG Cut File has a natural, unforced beauty that translates well to embroidery. It doesn’t try too hard, and that’s exactly why it works. The ornaments feel like a thoughtful addition, not a logo or a loud statement. That kind of understated elegance increases the perceived value of a simple item like a tote bag or a baby blanket.
For small shop owners, that means higher customer satisfaction and a better chance of repeat buyers. A well-chosen floral ornament can make a product feel giftable without custom personalization, and it photographs well—important for Etsy listings and social media. The design also leaves room for personalization, like adding a short name or a date in a complementary font, without feeling cluttered.
Final Thoughts on the Digital File Experience
The fact that this download includes AI, EPS, SVG, and PNG formats gives you flexibility. You can use the SVG for precise digitizing, the EPS for large-scale adjustments, the AI for further editing, and the PNG for quick mockups. That’s a practical set of tools for a designer who works with both embroidery and paper crafts. I’ve used similar files for vinyl cutting, screen printing, and even as a template for an applique design. The ornament shapes are clean enough to cut directly with a cutting machine if you also make patches or iron-on designs.
As a reviewer who cares about the finished product, I’m satisfied. The Decorative Floral Ornaments SVG Cut File met my expectations for a real project. It’s not a shortcut—you still need to digitize and test—but it’s a solid foundation. If you’re building a handmade product line, stocking your Etsy shop, or preparing a personalized gift, this set is worth adding to your design assets. Just remember to test, choose your fabrics wisely, and let the design speak for itself.